Proof of Humanity: a Deep Dive into the Blockstack Token Sale Registration App

TL;DR: The Blockstack Token Sale Voucher Registration App uses decentralized Blockstack IDs and social media account proofs to make sure registrants are real humans. Read on for a behind-the-scenes look into how it works...
It's the middle of the Blockstack Token Sale Registration period, where users have the opportunity to register for a voucher to purchase tokens, which will used on the Blockstack network. In this post, I'm going to do a technical walkthrough of the entire registration process for token sale vouchers from creating your Blockstack ID through the post-registration processing of submissions. Along the way, I'll share some code examples and shed some light on the behind the scenes magic that goes into this process.
Token sale registration

There are two registration paths for the Blockstack Token Sale. Accredited investors and qualified purchasers register through Coinlist. This happens through a traditional username and password form-based sign up much the same as any website you've used in the past decade or two. After creating an account, users verify their identity and accreditation by uploading a scans of government documents and other materials.
In contrast, individuals interested in obtaining a voucher for an opportunity to purchase tokens in the future after the network goes live register using their Blockstack ID via a Blockstack app. With one click, the voucher registration app receives cryptographic proof that the person owns the Blockstack ID they claim and proof of social media account ownership.
Now let's take a look at how this voucher registration process works under the hood.
Create your Blockstack ID
The first step of the voucher registration process is to create your own Blockstack ID. This is a one-time process that happens when you first install Blockstack.

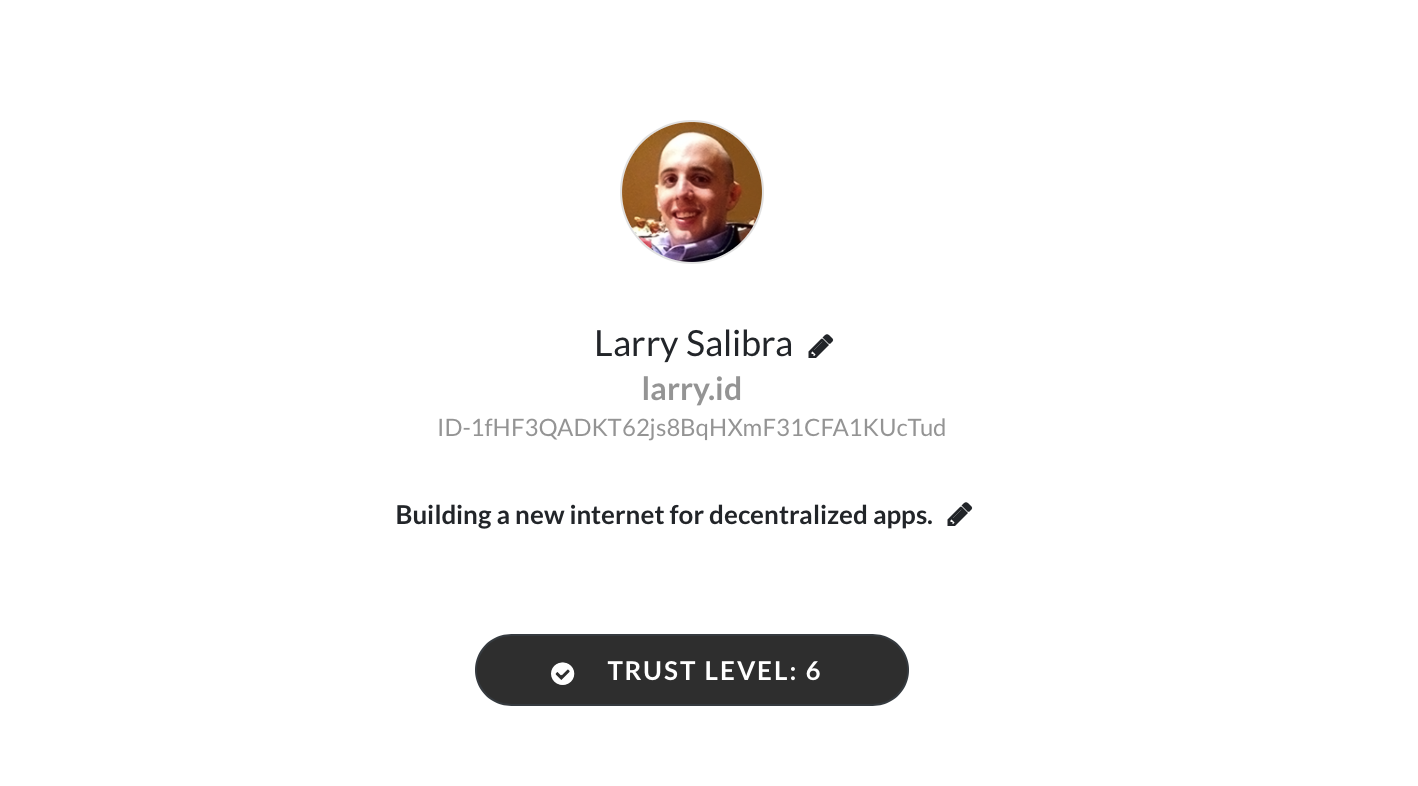
Your Blockstack ID is like a driver's license issued by a government or a student id from your school and includes information that describes you such as your name and photo. You use a Blockstack ID to identity yourself to other users and sign in to apps much like I can say I am @larrysalibra on Twitter and use my Twitter account to sign in to apps that offer sign in with Twitter.
With traditional IDs, a third-party issuer decides what information goes on your ID and in turn use their reputations to attest to the validity of that information. When I show someone my Hong Kong ID card, they trust that my birthday is what's written on the card because the Hong Kong Government doesn't have a reputation for making up birthdays.
In contrast, you decide what information goes on your Blockstack ID. You can offer proof of some of your claims such as ownership of a Twitter account. You can also ask third parties to attest to claims made in your Blockstack ID - for example, a government could sign your Blockstack ID to indicate that it has verified your name is the legal name they have on record.
Think of your Blockstack ID as your digital passport on the new internet for decentralized apps. Let's go through the process of creating a Blockstack ID step-by-step.
Create your keychain
Unlike traditional IDs which are created by institutions such as governments, schools, companies, or clubs, Blockstack IDs are created by the people who own them.
The first step of creating a Blockstack ID to generate a secure keychain that will own your Blockstack IDs. This happens once during the Blockstack on-boarding process.
This keychain is consists of a private key which is generated from a cryptographically-secure source of random data. It is represented as a 12 word mnemonic phrase called a keychain phrase.

All of your Blockstack IDs, wallet addresses and their private keys are generated from this phrase, so it is important to write down this keychain phrase and keep it in a safe place.
After generating the private key of the keychain and corresponding keychain phrase, Blockstack creates the first Blockstack ID. This uses the same methods used in Bitcoin wallets to derive a private key from a tree of keys whose root is the private key represented by your keychain phrase.
Each branch of the tree at a given level is represented by an index. The first Blockstack ID of your wallet is 0th index child of the identity keychain, code for the derivation of which is in the image below.

This process results in the private key of your Blockstack ID and a bitcoin address that uniquely identifies your Blockstack ID. This identity address is displayed with the ID- prefix in the browser and is how apps tell you apart from another user. It also is the address that owns a username should you choose to add one.

Fill out your profile
After creating a Blockstack ID, the next step is to add public information to your Blockstack ID that helps other to identity you. This information such as your name, photo and bio and your social media accounts makes up your profile and is stored as a [JSON](link to JSON wikipedia) object payload encoded in a signed JSON web token in a file on your storage provider.
On Gaia Hubs like that used by the default storage provider option in Blockstack, the location of this profile file is deterministic. Given the web address of the Gaia Hub, the identity address of the first Blockstack ID in the keychain and the index of the Blockstack ID whose profile file you want to find, you can create the web address of the profile file by using this template:
<gaia-hub-address>/<0th-identity-address>/<identity-index>/profile.json
For example, the identity address of my Blockstack ID larry.id is 1fHF3QADKT62js8BqHXmF31CFA1KUcTud and since that also happens to be the first Blockstack ID on my keychain, the index of the Blockstack ID is 0. Knowing that I use the default storage option whose location is https://gaia.blockstack.org/hub/, we know that we can find the profile for my Blockstack ID at the URL https://gaia.blockstack.org/hub/1fHF3QADKT62js8BqHXmF31CFA1KUcTud/0/profile.json.

Each time we add information to the profile, a new JSON web token object is created holding the new profile payload and signed by private key of the Blockstack ID's identity address. This signature let others verify was updated by the owner of Blockstack ID and prevents third parties from tampering with it.
Verify social media accounts
You can also add social media accounts to your Blockstack ID and prove that they are accounts you own. These proofs show that the person who controls a given Blockstack ID also controls the social media accounts on other services they've verified in their Blockstack ID. In my case, social media accounts proofs in my Blockstack ID, larry.id give others confidence that larry.id is the same person that owns the Twitter account @larrysalibra, not someone attempting to impersonate me by entering my name and uploading my photo.

Social media account verifications on Blockstack are simple and elegant. They include two pointers - links - that together securely demonstrate common control. One pointer is securely stored in your Blockstack ID's profile and points from your Blockstack ID to the username on the social media service you claim. The second pointer points from your user account on the social media platform to your Blockstack ID. This link takes the form of a message in a post on the social media service that only your username could create.
The process of adding a social media account to your Blockstack ID and verifying it consists of 3 steps:
1. Add account identifier to profile
First, you add your identifier on the social media service, typically your username or handle, to your Blockstack ID's profile. This adds an entry to the array stored in account key in your profile. In the following example, I've added my Twitter handle, larrysalibra as an account in my profile:
"account": [
            {
              "proofType": "http",
              "identifier": "larrysalibra",
              "@type": "Account",
              "service": "twitter",
              "proofUrl": ""
            }
]
As you can see above, the object for a social media account includes a few properties. The @type and service entries indicate that this is an entry for a Twitter account. The proofType entry indicates that the proof will be a link that can be verified by making an a request to a web site using the HTTP protocol.
At this point in the process, if someone looks up my Blockstack ID, they will see that while I claim the Twitter handle @larrysalibra, the claim is unverified.

Social media accounts that are unverified are clearly indicated as such with a red warning. You should not trust accounts as being owned by the owner of the Blockstack ID if that are not verified. While anyone can claim to own a social media account in a Blockstack ID, only the person who controls the social media account can post the matching proof on the account and make the claim verified. This makes it more difficult for someone to impersonate another by adding their social media accounts to a random Blockstack ID - they would all appear "broken".
2. Add a proof to the social media account
The next step of process is to add a post to your social media account that proves you control that account. You do this by posting a message to your account that include your identity address, the bitcoin address that uniquely identifies your Blockstack ID.
Blockstack helps you generate the proof message for you. Below is the message I posted on my Twitter:
Verifying my Blockstack ID is secured with the address 1fHF3QADKT62js8BqHXmF31CFA1KUcTud https://explorer.blockstack.org/address/1fHF3QADKT62js8BqHXmF31CFA1KUcTud
After posting this proof, you need to get a direct link to it - a URL that when opened opens directly to the single post containing the proof. For my Twitter proof, the direct link to the proof is https://twitter.com/larrysalibra/status/924291925884092421.
You then add this link to the social media account object created in the first step of this process. After adding the proof link to my Twitter account in my Blockstack ID, the new account object looks like this:
"account": [
            {
              "proofType": "http",
              "identifier": "larrysalibra",
              "@type": "Account",
              "service": "twitter",
              "proofUrl": "https://twitter.com/larrysalibra/status/924291925884092421"
            }
]
3. Verify that social media proofs are valid
This final step is entirely automatic and is performed by software each time someone wants to make sure that the social media accounts claimed by a Blockstack ID have matching proofs.
The software, typically the validateProofs() function in our blockstack.js library, fetches the contents of the page in each link and searches through the contents of the page for proof message. The message can't be in just any location in the page, but must be in an area that is known to be editable only by the owner of the account. This is usually a user post area or a specific metadata tag. This prevents a would-be impersonator from posting a comment on your Facebook post that has a verification message for a Blockstack ID created by the impersonator in it.

Once the message is found, the software verifies that the address listed in the proof matches the identity address of the Blockstack ID that is claiming ownership. If the address matches, the social media account is displayed as valid with a checkbox. If the address doesn't match, the verification message can't be found or the proof URL can't be loaded, the social media account is displayed as unverified.
Add a username (optional)
The final step of creating a Blockstack ID is an optional one, adding a username. Adding a username to your Blockstack ID means using bitcoin to "buy" a human-friendly name that is owned by identity address your Blockstack ID. I use quotes around the term buy because you're not really buying the username from anyone. Instead, you're creating the name by burning bitcoin - sending the bitcoin to an unspendable address
Adding a username to your Blockstack ID has a number of benefits. It gives you an easily rememberable name to give to other people so that they can find you. Saying "Hi, I'm larry.id!" is a lot easier to remember than saying "Hi, I'm ID-1fHF3QADKT62js8BqHXmF31CFA1KUcTud!"
Adding a username also gives you control of where your data is stored. Without a username you can only use the default Gaia storage hub provided by Blockstack Public Benefit Corporation. With a username, you can point your Blockstack ID to a profile file and other data stored on other storage providers by updating the username's zone file.

In the future, adding a username to your Blockstack ID will also enable things like multi-device support, the ability to interact with other users on the Blockstack network, and the ability to host websites and other services accessible via your name.
Register for the Token Sale Voucher
Now that you've created a Blockstack ID, you can sign into apps including the Blockstack Token Sale Voucher Registration App.

The registration process consists of two steps with three clicks in total. The first is signing in to the registration app with your Blockstack ID. Once you've signed in, you can fill out your legal name, email and address to finish registration for the token sale voucher. While this three-click process - one click on the "Sign in with Blockstack" button, one click to approve the sign in request in your Blockstack Browser and one more click to submit your registration - takes only a minute, there's a lot going on in the background.
The token voucher registration app cryptographically verifies your ownership of your Blockstack ID and then independently verifies that you are the owner of the social media accounts you've claimed in your Blockstack ID. It also pre-populates the registration form with your name and email address.
Let's take a deeper look at what's going on here.
Click sign in button
When you click the sign in button, the voucher registration app starts the process of generating an authentication request that will be sent to your local installation of Blockstack which will ask you whether or not you want to approve sign in to the app.
This process starts when the app, calls the redirectToSignIn method of blockstack.js. This convenience method calls the makeAuthRequest which does the heavy lifting by generating an authentication request JSON web token. It then redirects the user's web browser to the Blockstack Browser to ask the user to approve the sign in.
The first step in creating an authentication request is
create a temporary private key called the transit private key. This key is stored in your browser in the local storage of the app. The public key of this private key is calculated and provided to Blockstack as part of the authentication request. Blockstack uses the transit key's public key to encrypt sensitive information destined for the app in the authentication so that only the app can read it.
The authentication request is a JSON web token that is signed by the transit private key of the app. The payload of the token includes information about the origin of the app, the location of the app's manifest.json file, the types of access or scopes that the app is requesting and information about where the user should be sent if she chooses to approve the app's request to sign in.

Finally, the app calls the redirectToSignInWithAuthRequest method to send the user to Blockstack to approve the request. This method redirects the user's web browser to an address that is the blockstack: custom protocol handler followed by the encoded authentication request token. Blockstack configures the user's operating system to handle blockstack: requests. When Blockstack receives an open request for a blockstack: address, it reads the authentication request token and redirects the user to the Blockstack Browser authentication endpoint which is http://localhost:8888/auth?authRequest=.
Approve sign in request
On receiving an authentication request token at the authentication endpoint, the Blockstack Browser decodes the token, verifies its contents and displays an approval dialog much like you'd see when you try logging in to an app that uses login in with Facebook.

As we discussed above, the payload of the authentication request token includes a variety of data about the app requesting sign in and the type of access it would like. As part of loading the authentication request, the Blockstack Browser downloads the manifest.json file which provides metadata about the app including the app's icon and name which are displayed to the user.
All apps get basic information about the user when they approve a sign in. This basic information includes the information in their public profile - name, profile photo, etc, their decentralized identifier, and a unique app private key. The user's decentralized identifier is a string generated from their Blockstack ID's identity address and is used to uniquely identify the user at sign in. Below is the decentralized identifier for my larry.id Blockstack ID:
did:btc-addr:1fHF3QADKT62js8BqHXmF31CFA1KUcTud
The app private key is a private key that is deterministically generated from the private key of user's Blockstack ID identity address. Each app gets a unique key. This app private key is incredibly powerful and makes it very easy for Blockstack Apps to build in cryptographic features without having to worry about key management. The process of generating and backing up keys is outsourced to the Blockstack Browser. As long as the user keeps her keychain phrase in a safe place, any app's private key can be calculated from the keychain phrase.
The app private key makes it simple to build apps such as secure cryptocurrency or token wallets with only a few lines of code. It also makes it possible for apps to encrypt and decrypt files and other information client side, in the app in a way that only the copy of the app running on a user's computer can read the files.
In addition to these three pieces of information, apps are currently able to request two additional permissions or scopes in their authentication request. The first is the store_write scope which allows the app to write files to the user's Gaia storage in a partitioned area, or datastore, designated for that app. Each app requesting this permission gets their own datastore.
The second is the email scope. This permission, currently limited to a whitelisted series of apps, asks the Blockstack Browser to include the user's email address as part of the authentication response.
In the future, apps will be able to request a number of additional fine-grained permissions from users such as reading from or writing to shared collections such as the user's photos or friends list.
When the user approves the app's sign in request, the Blockstack Browser uses the makeAuthResponse method from blockstack.js to generate an authentication response token. Like the authentication request token, this response token is a signed JSON web token with a JSON object payload. The token includes the information we discussed above along a core session token if the app requested access to storage and the Blockstack ID's claimed username. The token is signed by the private key of the Blockstack ID's identity address.

After generating the authentication response token, the Blockstack Browser redirects the user back to the app adding the authentication response token to the redirect address so that the voucher registration app can read it.
App verifies sign in authentication response
When the app receives an authentication response, it decodes the authentication response, verifies the signature, decrypts the private payload items, and verifies that the username claimed by the user is owned by her Blockstack ID.
This is all done by the handlePendingSignIn method of blockstack.js.
Signature verification ensures that the private key of Blockstack ID the user claims via the iss field containing the user's decentralized identifier did in fact sign the authentication response token.
Private payload items, including the app private key and core session token (if provided), are decrypted using the transit private key and the same cryptographic routines that are used by blockstack.js for encrypted file storage.
Username verification happens via a name look up from a Blockstack Core node. This look up returns the identity address that owns the name and the code makes sure that this identity address is the same address as the Blockstack ID that generated the authentication response.
Apps are free to choose which Blockstack Core node the use to perform username verification. This choice is made in part by their trust model. A entirely decentralized app running entirely on a user's computer could choose to use that user's preferred Blockstack Core node since no one but the user needs to trust the result. A partially decentralized app such as the token sale voucher registration app or the Blockstack forum would choose to do the look up against a Blockstack Core node that it trusts to prevent users from using names they don't own.
Assuming these verifications pass, this data along with the user's profile data is stored in a user data object in local storage. This data is available to the app via the loadUserData function.
The token sale voucher registration app uses the user data from the authentication response to pre-populate email and name fields of the registration form to make life easier for users.

This entire process can happen either client side for a fully decentralized web app such as the Blockstack Todos app or on the server of a partially centralized app such as the Blockstack Forum.
Typical Blockstack apps would stop at this point, but the Blockstack Token Sale Voucher Registration App does additional processing on the authentication response data.
App verifies claimed social accounts
The Blockstack token sale voucher registration app is unique compared to typical Blockstack apps in that it not only uses sign in to authenticate a user is who they claim to be, but also as spam and sybil attack protection mechanism to make it harder for both people and bots to create multiple accounts.
The app does this by requiring that the Blockstack ID used to sign in to the app have one or more verified social media account.
The app sends the authentication response token to its server where the server stores and verifies the response token. It then proceeds to verify each of the social media accounts the Blockstack ID claims to own using the process described earlier. Users whose Blockstack IDs have no valid social media accounts are asked to add one.
The app stores the authentication response token and the Blockstack ID's profile at time of registration in its database to give us the opportunity to perform more sophisticated analysis before token vouchers are issued. We could potentially look at a number of metrics such as the age of the verified social accounts, the account's social graph, activity or other characteristics to help us make a determination of whether or not the Blockstack ID used to make the registration is an unique, individual human. This, combined with a government ID check before purchase significantly reduces the chance that people will be able to receive multiple vouchers.

Conclusion
Blockstack provides a set of tools that allow developers to quickly and easily build powerful decentralized apps. An app like the Blockstack Token Sale Voucher Registration App would have taken significantly more time to write with traditional tools. A traditional approach would have required signing up for developer accounts with each of the social media platforms, agreeing to terms of service and applying for API access tokens. It would have required learning and integrating multiple social media platform software developer kits and the development and testing of multiple redirect flows. It would have meant the developer taking responsibility for securely handling sensitive user access credentials that if lost could compromise the user's online identities. It also would have meant third party dependencies and additional points of failure.
By building a Blockstack app, we were able to neatly side step all of these problems. With Blockstack, we were able to build an app using one simple API, no third party dependencies, one single, easily tested user flow, all without having to handle valuable user credentials. It is the difference building a bug-prone, hard-to-test, honeypot-for-hackers, devops monstrosity versus an elegant, easy-to-test app that handles the least amount of user data possible.
Blockstack Apps are a win for users as well. Had we written the Blockstack Token Sale Voucher Registration app with traditional tools instead of Blockstack, the resulting process would be much more painful and invasive for users. The user would be forced to go through a back-and-forth redirect to each social media account, in the process, granting us access to each of their accounts. They would have had to trust that we wouldn't abuse that access or get hacked and lose the credentials that gave that access. Instead, they got a three-click process that doesn't require that they give us privileged access to their personal accounts.
The initial version of the Blockstack Token Sale Voucher Registration app took only hours to write. It takes less than 60 seconds for user to go from clicking to the sign in button to finishing registration for the token sale. A traditional app would have taken days to write and much longer for a user to complete.
Blockstack empowers developers to write decentralized apps that are both simple and powerful and to do so without anyone else's permission. It also enables a new class of apps that not only deliver a superior user experience through speed and simplicity but does so in a way where users don't need to trust unknown third parties.
Want to see Blockstack in action? Download Blockstack and try out the Blockstack Token Sale Voucher Registration App.
Are you a developer? Let me know what you want to build on Blockstack and how we can help you!
Thanks to Yukan Liao, Aaron Blankstein and everyone else that provided feedback on early versions of this post.
Disclaimer: The Blockstack Tokens are a crypto asset that is currently being developed by Blockstack Token LLC, a Delaware limited liability company, whose website can be found at www.blockstack.com. This post does not constitute an offer or sale of Blockstack Tokens (“the Tokens”) or any other mechanism for purchasing the Tokens (such as, without limitation, a fund holding the Tokens or a simple agreement for future tokens related to the Tokens). Any offer or sale of the Tokens or any related instrument will occur only based on definitive offering documents for the Tokens or the applicable instrument.